Electric Fuel Pump 6 Volt and 12 Volt Installation Instructions
Click here to download the full guide with images
Positive or Negative Ground
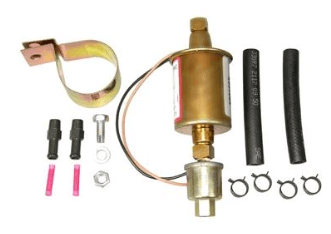
Thank you for purchasing one of our electric fuel pump connection kits. These instructions are for installation only. Please read the pump manufacturer instructions for any warnings or other helpful information. Installation of fuel pumps requires some specialty tools and supplies. They are thread seal tape, tubing cutter and flaring kit. Before you get started disconnect the battery. Never skip this step.
The fuel pump can be mounted wherever you choose; however, it is our experience that mounting close to the fuel tank results in less fuel leaking after you have cut the fuel line. Lightly flaring the tubing is recommended as you want the hose and hose clamp to have something to grip and gives you less chance for leaks. Install the hose clamps.
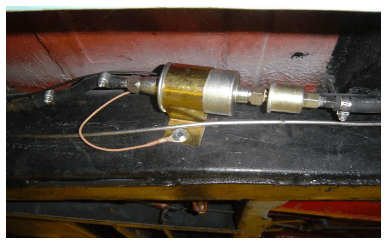
Once you have the pump mounted and all lines connected you can start the wiring. The 1⁄4” ring terminal will get crimped to the ground wire on the fuel pump. If your vehicle is negative ground this is the black wire. If your vehicle is positive ground this is the brown wire. See the photo, Notice we used the mounting screw also as the ground for the pump.

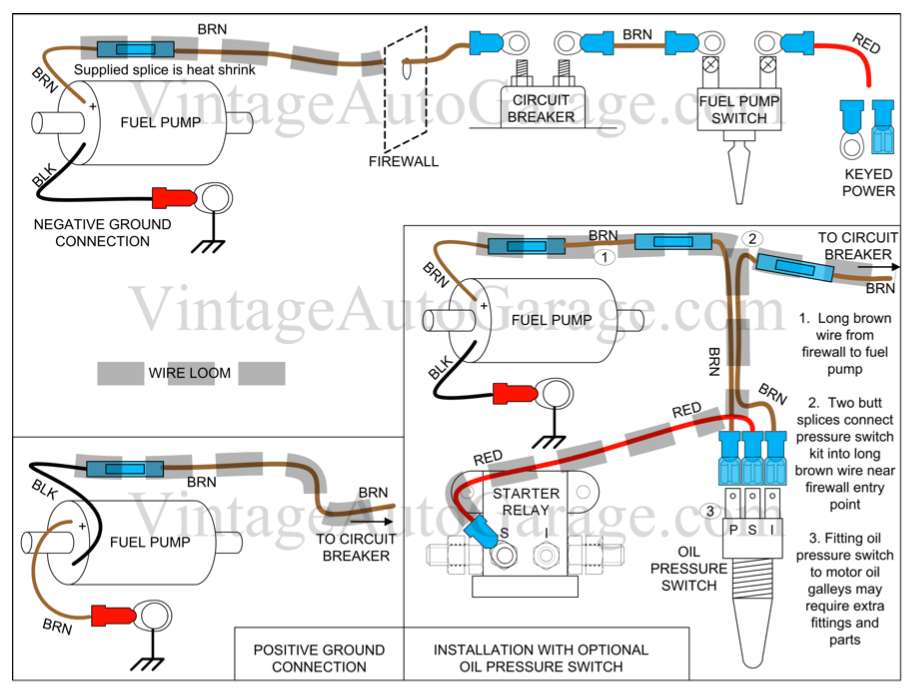
Now that the ground wire is connected, next you will wire the power side. We have supplied wire and protective loom. Before you attach the wire, run it through the loom. This will protect the wire from mishaps that may render it unusable. You will butt connect the wire to the remaining wire coming from the fuel pump.

Note: The above image is a + positive ground installation. (brown wire to chassis) and the black wire to the power switch.
Next, find a place under the dash to mount the ON/OFF switch. Do this step before running the wires inside. To run the wire coming from the fuel pump to inside the vehicle look at the firewall where the factory has brought in their wires. It may take a little work to go through the rubber grommet but this will insure no chafing of the wire and you will not have to cut any extra holes in the vehicle.
Next wire the switch. One side of the switch goes to the fuel pump. This side will get the inline circuit breaker supplied. Cut the wire and install the connectors supplied. The other side of switch can now be connected to a switched or un- switched power source. The diagram shows a switched circuit. You can also connect to a constant voltage un-switched source. Where you connect the power is your preference. Some want the pump to turn off with the ignition switch while others would like to have constant voltage and turn on the pump before cranking the engine.
Reconnect the battery, and test pump and lines for leaks before driving the vehicle.
WARNING: fuel pumps can generally work with mechanical pumps, however the manufacturer does not recommend running electric fuel pumps with a defective mechanical fuel pump. This can cause fuel to enter the crankcase.

