Starter Installation Instructions
Click here to download the full guide with images
When replacing the old starter with a new Hi Torque gear reduction starter you will need to ensure you have selected the correct starter for your engine make, year and model. If you need help in selecting the correct starter you can refer the starter application guide on our website. The application guide can be found under the Resources tab on vintageautogarage.com.
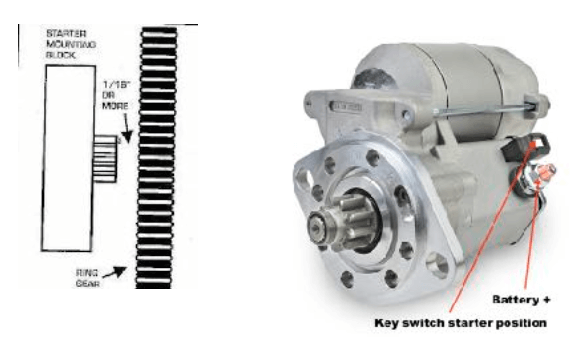
For correct fitment, check the clearance between the front starter pinion gear and the teeth on the flywheel are within tolerance. The front edge of the flywheel teeth to the front edge of the starter pinion gear should be .100 +/- .040 or 1/16”. This clearance ensures proper engagement of the starter gear and proper clearance away from the flywheel teeth when starter pinion is at rest.
Our starters can be re-clocked or re-indexed for proper clearance. Simply remove the metric Allen head screws from the face plate and clock to the desired location then re- install and torque the screws in place.
Once installed, connect the + battery cable directly to the starter large terminal and the ignition switch start position connection to the small terminal as should below.
GROUNDING:
Make sure starter to engine mounting points are free from paint, oil, and debris (Wire brush if necessary). Keep in mind mounting bolts may not provide adequate grounding and may need to add grounding straps.

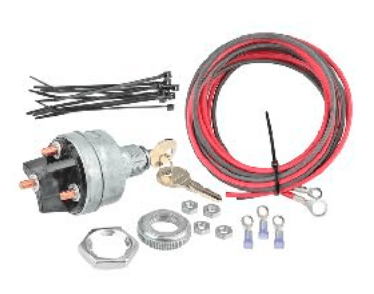
Gear reductions starters have a built in solenoid and require a key switch or push button to start. If the vehicle has a foot pedal actuated starter install key switch kit.
SKU: WHS1

