SGR1 Installation Instructions
Click here to download the full guide with images
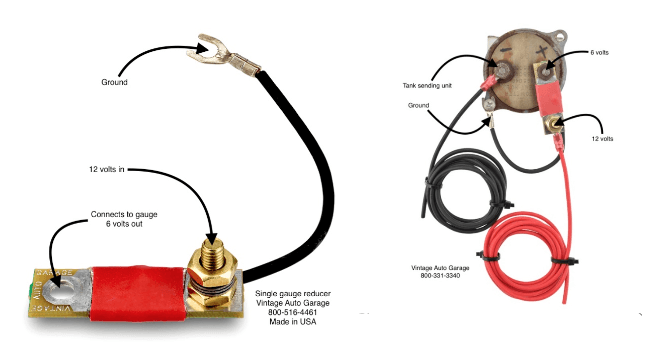
The SGR1 single-gauge reducer is designed to reduce and regulate 12 volts to 6 volts to operate an original 6 volt oil, gas or temperature gauge on a negative ground 12 volt system. Use one SGR1 reducer per gauge. This unit will not operate multiple gauges or amp gauges.
1. Disconnect the battery when working on your electrical system. Do not skip this step. This is for your safety!
2. Locate the brass screw on the gauge reducer. Remove the nut and take one of the lock washers and place it over the gauge + stud. Next place the reducer onto the gauge stud and replace the gauge stud nut. Do not over tighten the nut as this can cause damage to the reducer circuit board. Be careful that the brass screw head does not touch the gauge metal surface as this could cause a short circuit.
3. Attach the 12 volt source to the brass screw and tighten the supplied nut.
4. Attach the black ground wire to one of the screws that secure the gauge to the housing. It is
very important that this unit has a good ground. If the gauge itself is mounted in a non-
conductive panel, the black wire will need to be connected to a good chassis ground.
5. Reconnect the battery and test the gauge.
Shown above with optional wiring kit WKGR which includes black wire, red wire, and nylon ring terminals.

